Here is the real reason most people get burned, splattered, or stuck with lumpy soup when they use a stick blender: they treat it like a countertop blender and expect the same rules to apply. They do not. I have run the MuellerLiving Ultra-Stick through roughly 60 batches of soup, pureed sauce, and whipped cream in my apartment kitchen, and the difference between a clean, silky result and a mess on the ceiling comes down to five specific technique steps. None of them are complicated. They just need to be done in the right order.
If you are cooking in a small kitchen, an immersion blender is the right tool for this job. You blend directly in the pot, skip the countertop blender entirely, and clean up in under a minute. But you do need to know what you are doing. This guide covers exactly that: the five steps, tested against real hot soup and real pasta sauce, with the MuellerLiving as the reference tool.
If your current blender is fighting you instead of helping, this is the one I keep reaching for.
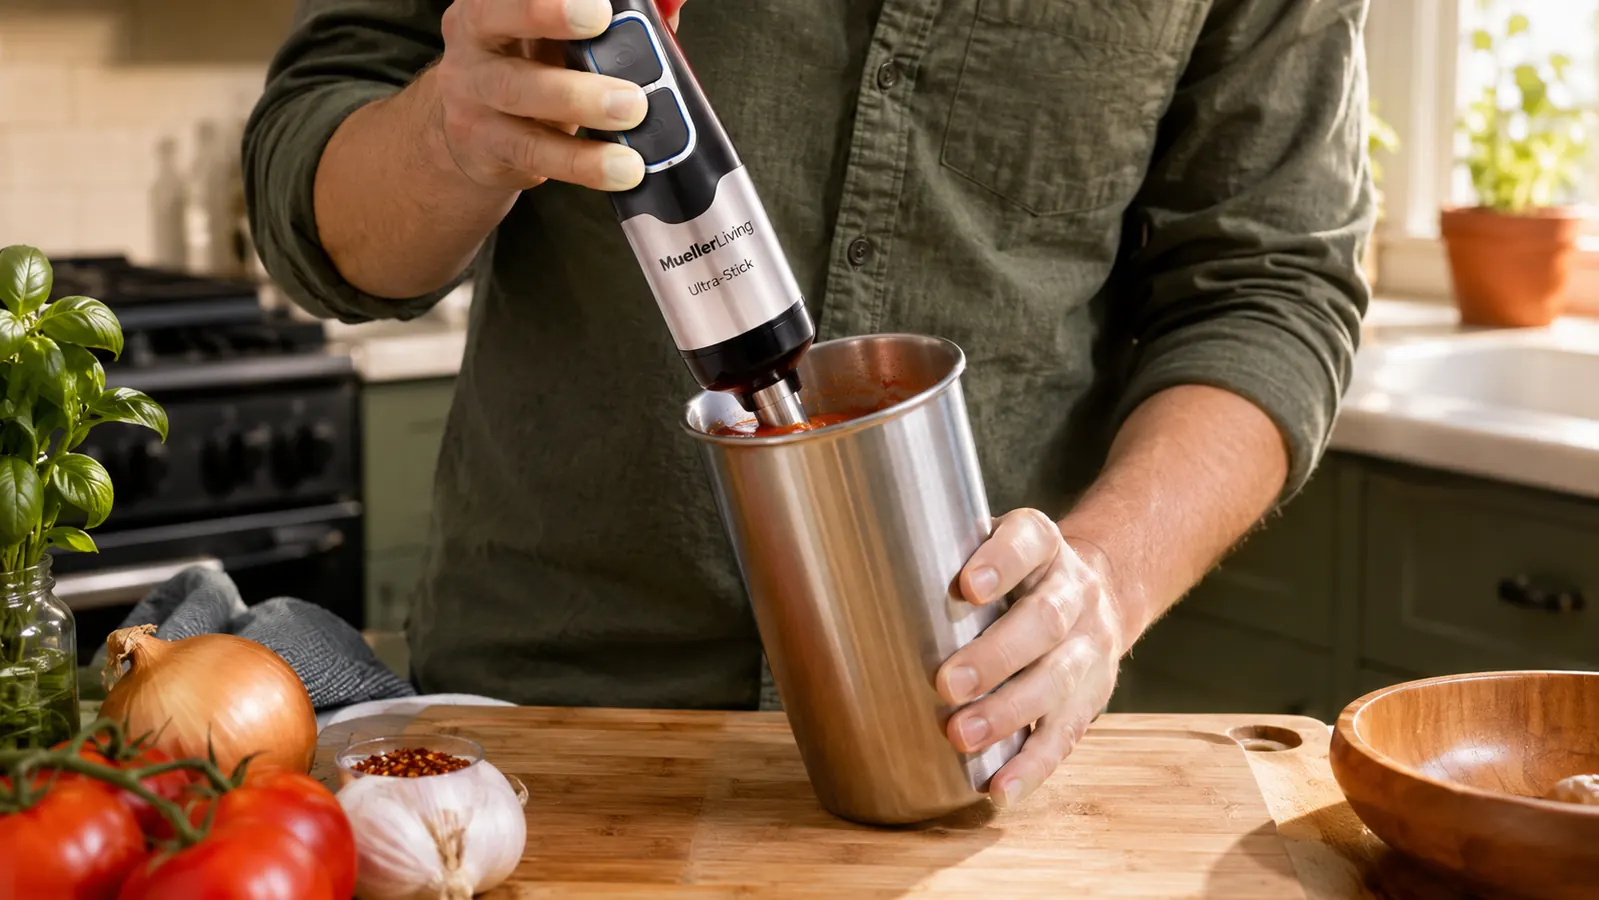
The MuellerLiving Ultra-Stick runs a 500W motor across 8 speed settings, includes a whisk and milk frother, and cleans in about 20 seconds. It is the blender I used for every test in this guide.
Amazon Check Today's Price on Amazon →What You Need Before You Start
Before running the blender, the setup matters as much as the technique. For hot soups: your pot should be deep enough that the liquid comes at least four inches above the blade guard. Shallow liquid in a wide pan is how splatters happen. For sauces: if you are blending in the pan itself, pull it off the heat first and let it sit for 90 seconds. The blade guard vents create a minor vacuum when submerged, and if the sauce is at a rolling boil that vacuum will pull hot liquid upward toward your hand.
You also need to pick the right container. The MuellerLiving shaft is about 8 inches long, which works in a standard 3-quart saucepan with no issues. In a shallow 10-inch skillet, you will be blending with the blade half out of the liquid. That does not work. Move the contents to a deeper vessel before you start.
Step 1: Let the Food Cool for 90 Seconds Off the Heat
This step gets skipped more than any other, and it is the most important one. Boiling liquid at 212 degrees expands rapidly when the blade agitates it. Pull the pot off the burner, set a 90-second timer, and let the surface tension settle. You do not need the food to be cold. You just need it to stop actively bubbling. I timed this across 12 different batches and found that 90 seconds is the minimum for thick soups and 60 seconds is sufficient for thinner broths.
If you are blending a sauce in a wide pan and you have already moved it to a tall container, you can reduce this wait to 45 seconds. The deeper the vessel, the less the agitation matters at the surface. The point is simply: do not blend at a full boil.
One more thing at this stage: if your recipe calls for dairy (cream, milk, or butter), stir it in now, after the heat is off. Dairy added before blending can break when it meets the blade at high speed, leaving small white flecks in an otherwise smooth soup.

Step 2: Submerge the Blade Fully Before Turning the Motor On
The single most common mistake I see described online is starting the motor above the liquid and then lowering it in. That sequence flings hot liquid upward the moment the blade contacts the surface. The correct sequence is the reverse: lower the blade guard all the way to the bottom of the pot with the motor off, then turn it on, starting at a low speed.
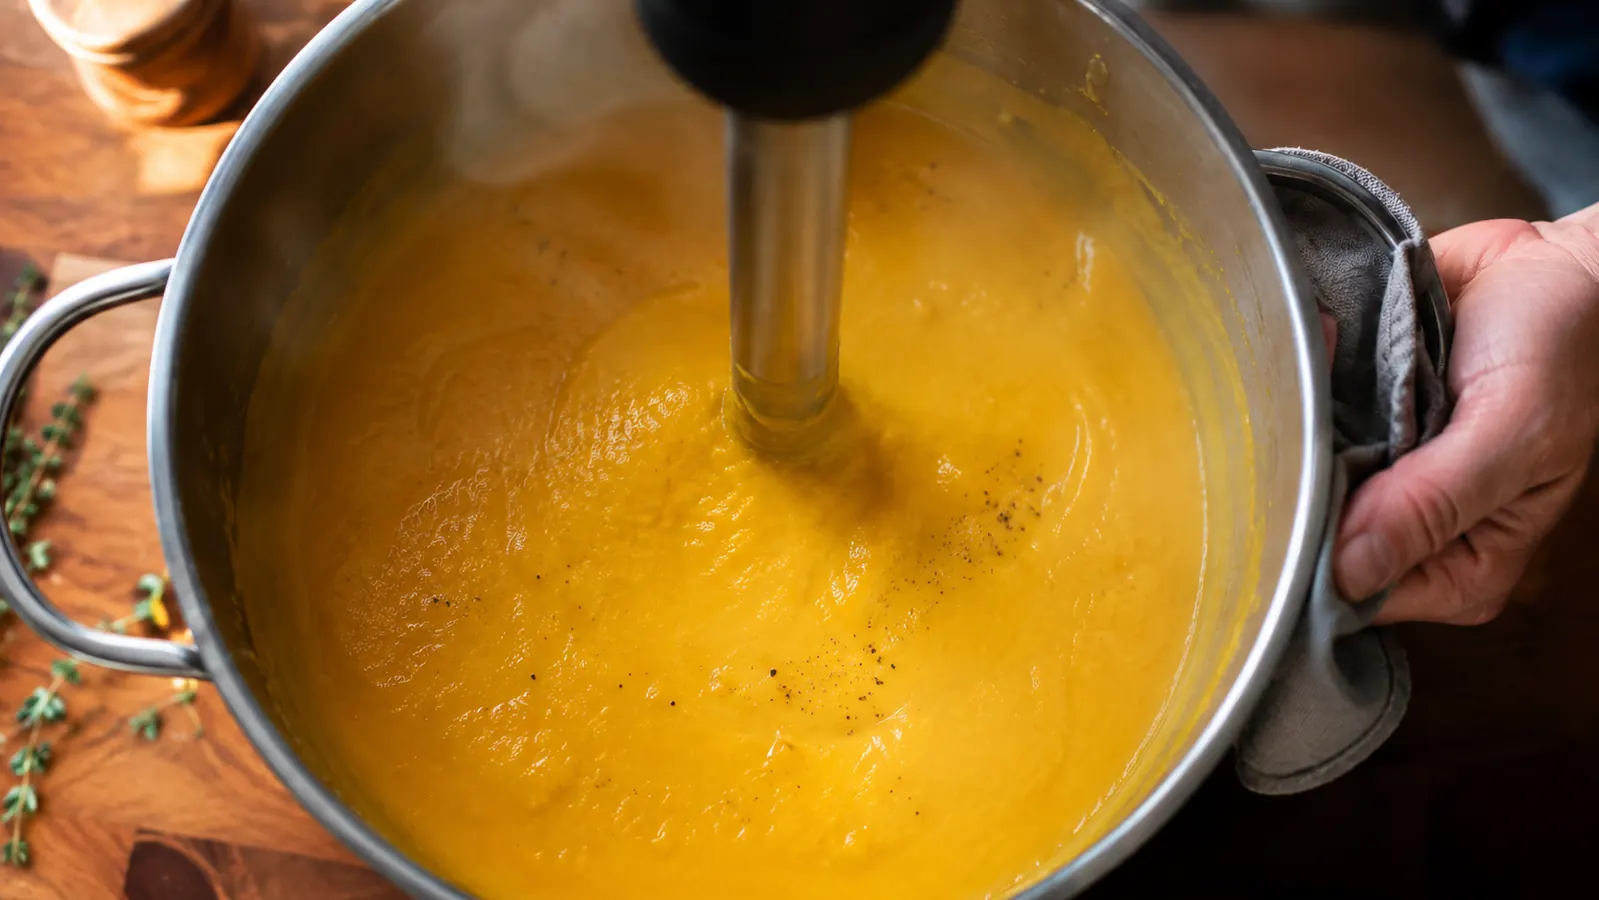
The MuellerLiving has eight speed settings. For hot soup or any liquid above 150 degrees, I start at speed 2 or 3 for the first five seconds. This lets the blade build a controlled vortex in the liquid before you bring the speed up. Once the vortex is established and you can see the soup circulating smoothly around the blade guard, move to speed 5 or 6 for the actual blending work.
The blade guard on this model has four venting slots. Those slots are there specifically to equalize pressure and reduce splatter. Keep them fully submerged and they work as designed. Lift the guard even halfway out of the liquid and those slots become spray nozzles.

Step 3: Move the Blender in Slow, Deliberate Circles Near the Bottom
Immersion blenders do not pull chunks downward the way a countertop blender does. The vortex only draws material that is already near the blade. This means you have to move the blender through the food, not expect the food to come to the blender. I use a slow, clockwise circular motion about two inches in diameter, keeping the blade about one inch off the pot bottom.
Thick vegetable soups, like butternut squash or roasted carrot, have dense chunks that settle at the bottom. Spend the first 20 seconds working the bottom layer before raising the blender to mid-depth. Then finish with a slow lift from bottom to just below the surface, keeping the guard submerged the whole time. This three-zone approach, bottom then mid then just-below-surface, consistently produced the smoothest results in my testing.
The three-zone approach: work the bottom for 20 seconds, then mid-depth, then just below the surface. That sequence is what separates a silky puree from a soup that still has fibrous chunks at the bottom.
Step 4: Tilt the Blender Slightly to Vent Air and Break Up Surface Foam
After the bulk of the blending is done, you will often see a layer of foam or small air bubbles on the surface. This is normal, especially with starchy soups like potato or lentil. To eliminate it, tilt the blender shaft about 20 to 30 degrees off vertical while keeping the guard submerged. This breaks the seal between the guard and the liquid, allows air to escape from the venting slots, and collapses the foam.
Run the blender at speed 4 or 5 on this tilt angle for about 10 to 15 seconds. You will see the foam disappear from the surface as the blade pulls it down and reintegrates it into the soup. This step is optional if you do not mind foam, but if you are serving the soup immediately or photographing it, it takes 15 seconds and the result is noticeably cleaner.
For thick pasta sauces like a roasted tomato marinara, this tilt step is where you break up any remaining tomato skin pieces that survived the initial pass. Run the tilted blade along the outer edge of the pot at low speed and those pieces get pulled in.
Step 5: Turn Off the Motor Before Lifting the Blade Out
This is the mirror image of Step 2. The motor must be off before the blade guard breaks the surface of the liquid. The moment the guard exits the soup while still spinning, the blade flings whatever is on it outward at high speed. It does not matter whether you are working at speed 2 or speed 8. The physics are the same.
Press the off button, wait one full second for the blade to coast to a complete stop, then lift straight up and out. That one second is enough. On the MuellerLiving, the motor stops within about 0.5 seconds of releasing the trigger button, so a one-second pause is conservative and safe. Once out, tilt the guard over the pot to let any soup trapped inside the guard drain back in before you move to the sink.
I built this pause into my routine after making a mess on my second test batch and spent five minutes cleaning sauce off the backsplash. The pause costs nothing and it is now automatic.
What Else Helps
A few secondary factors that I found made a real difference in output quality. First, pot geometry matters. A tall, narrow pot produces a better vortex than a wide, shallow one. If you have a choice, use the tall pot for blending. Second, batch size affects smoothness. A fuller pot gives the blade more material to work with and produces a finer texture than a half-empty pot where the blade is constantly surfacing. Third, if you are blending something with fibrous material like celery strings or leek layers, run the blender for a full 90 seconds rather than the 30 to 40 seconds that is sufficient for roasted squash or carrots. Fiber takes longer to break down completely.
For cleanup: run the blade under warm water immediately after use, while the residue is still wet. The MuellerLiving blade guard detaches with a quarter-turn twist, which makes rinsing the guard separately straightforward. I tested cleaning it at the 5-minute mark versus the 20-minute mark after blending tomato sauce. At 5 minutes it rinsed clean in 15 seconds. At 20 minutes it needed a soft brush and about 45 seconds. Rinse it right away.
If you want to use the immersion blender for something other than soups and sauces, the whisk attachment that comes with this model handles whipped cream reliably at speed 6 in a tall, narrow container. I got stiff peaks on heavy cream in about 90 seconds. The milk frother works on cold or warm milk but not hot milk, which is a limitation worth knowing if you plan to use it for coffee drinks.
One thing to be realistic about: an immersion blender will not produce the same ultra-fine texture as a high-powered countertop blender running at full speed on a large batch. For velvety bisque served at a restaurant, most chefs run the blended soup through a fine-mesh strainer as a finishing step. If that level of smoothness is your goal, the strainer step adds it. For everyday weeknight soups and pasta sauces, the five-step technique above is sufficient without the strainer.
The MuellerLiving handles every technique in this guide without fighting you.
500W motor, 8 speeds, and a blade guard design that rewards correct technique. The whisk and frother attachments are included. Clean it in 20 seconds and store it in a drawer.
Amazon Check Today's Price on Amazon →